A Guide For Designing Your First Custom Patch
Are you ready to get started creating your own custom patches? If you are, it’s time to take a deeper look at the process of creating custom patches...
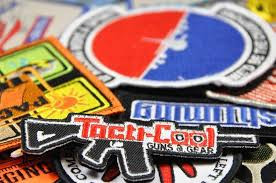
Are you ready to get started creating your own custom patches? If you are, it’s time to take a deeper look at the process of creating custom patches. Let's start with the basics of custom embroidered patches.
First things first, consider embroidery percentage. This refers to the amount of your patch that is covered with thread. Patches with less than 100% embroidery will have some of its twill backing visible.
Your design will determine the required embroidery percentages for your patches. The rule is, the more detailed and ornate your design, the greater the percentage of embroidery required.
Simple designs, such as basic name patches, may only require 50% coverage of the twill. A more detailed patch could require 75% coverage, and a really intricate design will cover 100% of the twill in embroidery thread. Your patch provider can help you determine the embroidery percentage for your design.
Once you have determined your design and your embroidery percentage, it's time to consider your border options. Embroidered patches have two border options, merrowed or hot cut. Merrowed borders wrap around the outside of the patch and are slightly raised. This is the traditional patch border. This option works well for designs with standard geometric shapes such as squares, ovals, circles, and rectangles.
Hot cut borders are a flat style that don’t stand out as much from the garment they’re attached to. They can be used on standard shapes, and are ideal for custom shaped patches.
Next up are attachment options. While sew-on patches are the most popular, you can also choose from iron-on, hook and loop, (Velcro®) and tape. The attachment style that’s best for your design depends on your specific needs. Once again, your patch provider will be glad to help you select the right attachment method for your design.
Now consider thread color options for your design. A reputable patch provider will offer at least seven color for free. If your design features 50% or 75% embroidery, you can also a twill color to complement the thread color(s). With many thread colors to choose from, you can get creative and add something unique to your design.
Now let's talk text! Determining your text size, font, and placement is an important piece of the puzzle. If your design has small text, you can enlarge the size of your patch to increase the visibility. The same applies to logos, symbols, and other details you want to include in your design. Generally speaking, keeping things simple will provide the most impact.
At Patches4Less.com, we make ordering custom patches easy, fast and fun. If you are ready to get started, we are here to help. Get a free quote or email us with any questions you may have. Let us show you how easy ordering custom patches can be!
