General Guide: Designing Your Own Patch


Designing your custom patches is such a fun and creative way to represent your brand, remember a special occasion, or show off your unique style! We know that capturing your vision in a patch design can be tricky. That's why at Patches4Less.com, we're here for you every step of the way. Our expert design team is ready to assist you in creating the perfect patch that truly reflects your style and looks amazing once it's made!
Refine Your Design Through Mockups
Share Your Ideas With Us
We believe that great designs start with great ideas. Whether you have a detailed sketch or just a rough concept, sharing your thoughts with our team is the first step in bringing your custom patch to life. There are two easy ways to send us your design:

Email or Upload a Basic Sketch:
If you’ve got a rough sketch of your design, feel free to send it via email or upload it directly on our website! Make sure to share all the details you can think of – colors, shapes, and specific elements you’d like to see. The more you tell us, the better our designers can bring your vision to life in a mockup.

Upload Your Design File:
If you have a finely tuned design, feel free to upload your design file along with all the details. This will help our team understand your vision clearly and make sure nothing gets overlooked during the process of turning your concept into a mockup.
Understanding the Patch Design Journey
At Patches4Less.com, creating your custom patch is an exciting journey! Let’s walk through the essential steps that bring your idea to life.

Email or Upload File with Details:
To get started, share your design ideas with us! You can send us an email or upload a simple sketch along with some notes. Alternatively, you can submit a full design file directly on our website. This first step helps us grasp your vision and the unique elements you’d like in your patch.

Our Team of Artists Will Send You a Digital Proof:
After we get your design, our amazing team of artists will craft a detailed digital preview of your patch. This preview will showcase approximately how your patch will appear, showing you its colors, shapes, and intricate details.

Approve the Design or Request Changes:
Once you've had a look at the digital proof, feel free to give the design your approval or ask for any tweaks you'd like. Remember, we're happy to make as many changes as needed until every bit is just the way you want it. Your satisfaction with the final design is our top priority!

Send Payment, Initiate Production and Receive Patches:
Once you give the final design your thumbs up and make the payment, we'll start working on bringing your custom patches to life. Rest assured, each patch is meticulously crafted with precision and care before being sent your way. Anticipate the arrival of your custom patches at your doorstep around 14 to 17 days after you've approved your order and completed the payment. See our FAQ for more about turnaround times.
Determining the Right Size for Your Custom Patch
Determining the right size for your custom patch is crucial to ensure it fits your design perfectly. The size of your patch affects how well the details of your design are displayed, ensuring your logo, emblem, or graphic looks its best.
Calculate Your Patch Size for Accurate Pricing
Custom patches come in all sorts of shapes and sizes. To ensure we give you accurate pricing, we base this on the average size of your patch.
Here’s a quick and easy way to figure out the size:
- Measure the Length and Width of your desired patch. For irregularly shaped patches, the best approach is to create a box around the patch and measure the sides.
- Add these two measurements together.
- Divide the total by 2.
- Round up to the nearest whole or half-inch.
This simple calculation gives us the average size of your patch, which helps us provide precise and fair pricing just for you. Accurate measurements ensure you get a price that's perfect for your specific needs and will help you find a patch size that fits your budget. Visit our pricing page to see costs by size.

If the height of your patch is 2″ and the width of your patch is 4″ , you would add 2 + 4 , which equals 6 . You then divide 6 by 2 , which equals 3 , The size the size of your 2″ x 4″ patch would be 3" .
Your patch size is determined by taking the height and width,
adding them together, and dividing by 2.
Example: 3W + 2H / 2 = 2.5" Patch
This is for pricing purposes only.
What Patch Type Is Best For My Design?
Selecting the perfect patch type is crucial for making your design stand out! Each patch type offers unique benefits, whether you seek a classic style, detailed patterns, vibrant colors, or enduring quality. Here is an overview of various patch types accompanied by information on the best match for your design needs.

Embroidered Patches
- Textured and Traditional Designs: Best for classic designs that benefit from a tactile, raised surface.
- Bold and Simple Artwork: Ideal for designs with bold lines and simple shapes that stand out.
- High-Contrast and Limited Colors: Works well with high-contrast color schemes and a limited palette.
Choose embroidered patches if your design has bold, simple elements that benefit from a textured, traditional look. They excel with high-contrast colors and offer a premium, tactile feel.

Woven Patches
- Intricate and Detailed Designs: Perfect for designs that require fine details and clarity.
- Smooth and Sleek Finish: Ideal for designs that benefit from a smoother, flat surface.
- Small Text and Fine Lines: Best for designs with small text or fine lines that need to be clearly visible.
Opt for woven patches if your design features intricate details, small text, or fine lines. Their smooth texture and ability to capture detailed artwork make them a great choice for logos and detailed graphics.

Printed Patches
- Photorealistic Images: Best for designs that include photographic elements or complex images.
- Unlimited Colors and Gradients: Ideal for designs that require a wide range of colors and subtle gradients.
- Complex and Detailed Artwork: Perfect for highly detailed and complex designs that need precise replication.
Printed patches are the best choice for designs that demand vibrant colors and intricate details. They are excellent for replicating complex artwork and images with precision, allowing for a wide color palette.

PVC Patches
- Bold and 3D Designs: Ideal for designs that benefit from a 3D effect and depth.
- Durable and Weather-Resistant Artwork: Best for designs intended for outdoor use or harsh conditions.
- Vibrant and Long-Lasting Colors: Perfect for designs that require bold, vibrant colors that remain vivid over time.
Choose PVC patches if your design benefits from a bold, 3D look and needs to withstand tough conditions. Their durability and vibrant colors make them suitable for outdoor gear, sports equipment, and tactical designs.
Commons Patch Shapes: Find the Perfect Shape for Your Design
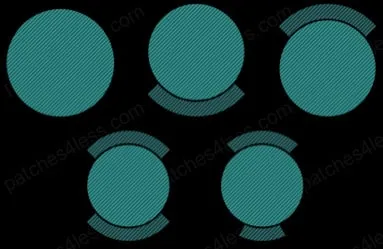
Circles and Rockers
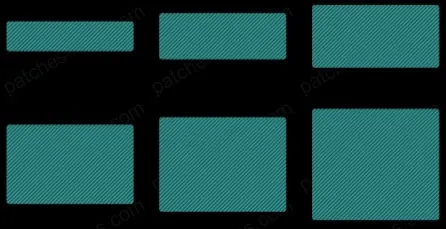
Squares and Rectangles
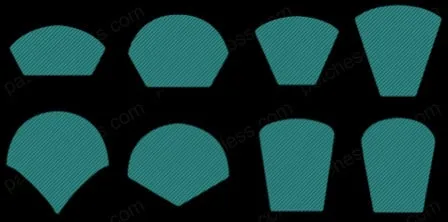
Wedges and Tombstones
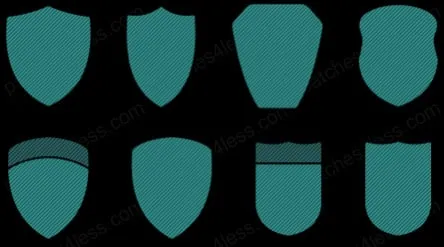
Shields
Choosing the Right Threads for Your Patch Design
The threads you choose for your custom patch are crucial to achieving the perfect look. The right thread colors can enhance your design, making it vibrant and eye-catching. Here's what you need to know about selecting the best threads for your patch:
- Color Matching: Ensure your design stands out by carefully selecting thread colors that complement and contrast with your patch background. Use our thread color charts to find the perfect match for your design, or let our expert design team choose the colors for you.
- Thread Types: Different thread types offer varying textures and finishes. Choose from standard polyester threads for durability and vibrant colors, or opt for specialty threads like metallic or glow-in-the-dark to add unique effects to your patch.
Explore our thread color charts below to find the ideal colors for your patch. Our wide range of options ensures you'll find the perfect threads to make your design truly stand out. And remember, our dedicated design team can handle the color selection for you, ensuring the best results for your custom patch.
Standard Threads
Colors displayed are a close approximation. Always see a physical color book to see an accurate color.
Standard Military Threads
Colors displayed are a close approximation. Always see a physical color book to see an accurate color.
Standard Twill
Colors displayed are a close approximation. Always see a physical color book to see an accurate color.
Selecting the Perfect Border for Your Patch Design
The border of your custom patch plays a significant role in its overall appearance and durability. Choosing the right border type can enhance your design and provide the finishing touch. Here’s what you need to know about the two main border options: hot-cut (custom shaped) and merrowed borders.

Hot-Cut (Custom-Shaped) Borders
- Precision and Flexibility: Hot-cut borders are perfect for custom-shaped patches. This technique allows for precise cutting around intricate shapes and designs, giving your patch a unique and tailored look.
- Smooth and Clean Edges: The hot-cut method uses heat to seal the edges, resulting in a smooth, fray-free finish that maintains the integrity of detailed shapes.
- Ideal for Irregular Shapes: If your design includes complex or non-standard shapes, hot-cut borders ensure your patch maintains its unique contours without compromising on quality.

Merrowed Borders
- Classic and Durable Finish: Merrowed borders offer a traditional stitched edge that wraps around the patch, providing a sturdy and classic finish.
- Best for Standard Shapes: This border type works best with standard shapes like circles, squares, and rectangles, giving them a polished and cohesive look.
- Enhanced Durability: The thick, stitched edge of a merrowed border adds extra durability to your patch, making it ideal for patches that will be worn frequently or exposed to rough conditions.
Choosing the right border for your patch can greatly impact its final look and durability. Whether you opt for the precision of a hot-cut border or the classic finish of a merrowed border, our team is here to help you decide the best option for your design.
Important Patch Details You Should Know
When designing your custom patch, there are several important details to consider that can significantly affect the final look and quality. Understanding these details will help you make informed decisions and ensure your patch turns out exactly as you envision.

Woven vs. Embroidered Patches: Which is Better?
Both woven and embroidered patches have their strengths, and the "better" choice depends entirely on your design needs and intended use. Here's a detailed comparison to help you decide:
| Feature | Woven | Embroidered |
|---|---|---|
| Thread Type | Thinner, woven flat | Thicker, raised |
| Detail Level | ✓ Intricate designs | Bold, simple designs |
| Texture | Smooth, flat | Raised, 3D look |
| Durability | Very durable | ✓ Extremely durable |
| Best For | Corporate logos, detailed graphics | Military, sports, uniforms |
| Starting Price | $0.63/patch | ✓ $0.47/patch |
The Verdict: Choose woven patches if your design has intricate details, small text, or requires a smooth, professional finish. Choose embroidered patches if you want a classic, textured look with maximum durability at the most affordable price point.

Complex-Fill vs. Satin-Stitch in Embroidered Patches
- Complex-Fill Stitch: This technique is used to fill large areas with a dense, detailed stitch. It is ideal for designs that require coverage over a significant portion of the patch, providing a solid and durable finish.
- Satin-Stitch (Column Stitch): Satin stitching, also known as the column stitch, creates smooth, clean lines and is often used for borders and lettering. It gives a polished look to the edges of shapes and text, making it perfect for defining the outline of your design.

Understanding Jump Stitches
- Jump Stitches: These are the threads that "jump" between separate parts of the design without being trimmed. They follow a specific pattern, connecting different elements efficiently and help connect various parts of your design without stopping the machine, ensuring the integrity and alignment of the pattern. Jump stitches are often found between letters in text, separated design elements, and small details that are close but not connected. While jump stitches might be visible on the front of the patch in certain areas, they are a normal and necessary part of the embroidery process. They do not affect the overall quality or durability of the patch.
PVC vs. Embroidered Patches: Cost, Durability & Quality Comparison
Choosing between PVC and embroidered patches depends on your priorities: cost, durability, appearance, and intended use. Here's a comprehensive comparison to help you make the best decision:
| Feature | PVC Patches | Embroidered Patches |
|---|---|---|
| Material | Soft rubber/vinyl PVC | Thread on twill fabric |
| Durability | ✓ Exceptional - waterproof, weatherproof, UV resistant | Very durable, may fade over time outdoors |
| Weather Resistance | ✓ Excellent - won't fade, rot, or deteriorate | Good, but can fade with prolonged sun exposure |
| Appearance | Modern, 3D raised design, bold colors | ✓ Classic, textured, traditional look |
| Detail Level | ✓ Excellent - sharp edges, fine details | Good for bold designs, limited fine detail |
| Best For | Outdoor gear, tactical equipment, backpacks, hats | Uniforms, jackets, traditional applications |
| Weight | Slightly heavier, more rigid | ✓ Lightweight, flexible |
| Starting Price | From $0.91/patch | ✓ From $0.47/patch (most affordable) |
| Production Time | 4-5 weeks | ✓ 14-17 days (faster) |
The Verdict: Choose PVC patches if you need maximum weather resistance, outdoor durability, and a modern 3D look. They're ideal for tactical gear, outdoor equipment, and harsh environments. Choose embroidered patches if you want the most affordable option with a classic appearance, faster production time, and traditional textile feel.
Knowing these details can help you better understand the options available for your custom patch and make choices that enhance your design. If you have any questions or need further guidance, our design team is always here to assist you.
Feeling Overwhelmed? We're Here to Help You Every Step of the Way
Designing the perfect custom patch can feel overwhelming, with so many details to consider, but don't worry! Our experienced design team at Patches4Less.com is here to assist you throughout the entire process. We've got you covered whether you're unsure about thread choices, stitch types, or border styles.
Don't stress about getting every detail right – that's what we're here for. Our experts will work with you to ensure your patch turns out exactly as you envision, providing guidance and support at every step. Reach out to us today, and let's create something amazing together!
-
Free Artwork and Design
-
Free Setup For Patches
- Free Shipping
-
Up To 7 Free Standard Thread Colors